Ad blocker detected: Our website is made possible by displaying online advertisements to our visitors. Please consider supporting us by disabling your ad blocker on our website.
Looks like my mind’s in the gutter (like Àine’s ). I read the title of the first post and figured it was just another advertisement for a male enhancement product.
John’s idea and other’s is clever and practical, but I’d be worried that I would have to lower the foot pedal to get my poor, arthritic joints high enough to be able to reach it – and then be limited to being able to chop moulding less than 1 inch.
Either that or I’d have to build a platform in front of it … then, I’d be afraid of falling off or tripping over the darn thing.
There is just no making me happy.
Don't take life so serious, son, it ain't nohow permanent! – Porky Pine
Another tip - see where the sides/legs curl around and form channels?
Stuff them full of something - it's a nightmare cleaning the woodchips out of that (If your Morso is on the floor and you leave it too long before emptying)
That's a brilliant tip, John! I have my waste chute funnelling material into a box, but at busy times, some of the bits overflow. Cleaned out a year's worth last week ( ) Wasn't too bad a job considering, but the fiddly bits you just mentioned were a royal pain in the proverbial.
Bill Henry wrote:Looks like my mind’s in the gutter (like Àine’s ).
You can blame that on both the convent education and my time in engineering. I had to learn at a relatively early stage in my former career to develop something of a thick skin, humour-wise. I also needed to train disguise my embarrassment. You wouldn't believe the content of some of the emails that some of my former colleagues in Orange used to send to me to try to make me blush. Not pretty...
........Áine JGF SGF FTB .Briseann an dúchas trí shuiligh an chuit.
Roboframer wrote:For a bit more blade height, without raising the pedal and apart from taking the pedal mechanism to the end of the long screwed rod....
If your Morso has two holes on the pedal linkage like mine - move it to the higher one.
John,
Since the lower end of the spring is attached to the pivot point, wouldn’t raising the other end just increase the tension?
Don't take life so serious, son, it ain't nohow permanent! – Porky Pine
Bill Henry wrote:
Since the lower end of the spring is attached to the pivot point, wouldn’t raising the other end just increase the tension?
I don't think so - I'd think the spring is made to take the maximum blade height the screwed rod and the choice of pivot point allow.
I'd think that with the higher holes the spring would be tensioned less at the end of the pedal travel, and, unless you adjust the pedal travel stop in the groove at the front of the machine to allow the pedal to come to rest right at the top - (so's you really do have to lift your foot) The springs are never fully relaxed.
This is how mine's been set for 10 years+ and I've yet to change a spring.
Actually - looking at the photo, those higher holes may end up lower down at the end of the stroke. But at rest they are higher/the spring is less tight.
Moglet wrote:I have my waste chute funnelling material into a box, but at busy times
That's reminded me - if you have a waste chute - it won't work with the linkage set as mine is - not without some modification - because the threaded rod moves forward and catches in the shute's slot.
Not your average framer wrote:You may remember mine, the arms and the uprights are made of 2" x 2" planed all round pine with short 45 degree 2" x 2" supports under the back of each arm. The arms, (18" long), have never drooped and the space between the arms is 10".
There are four 5" long, number 12 woodscrews for each arm through the upright into the arm, plus one from underneath the arm into the upright at an angle and each upright is secured to the wall with the same size screws in nice long rawlplugs. All joints are secured with Extramite resin woodglue. The uprights don't go down to the floor, so it's all hanging on those screws and there's about 450 lengths of moulding on there. Fortunately it's a very solid wall.
Mark has kindly sent some pictures to illustrate his storage system.
The first picure is a smaller rack above a window in my shops kitchen area. It's made with 34mm square timber and it's glued with Extramite and screwed together with plenty of woodscrews including some very long ones through the uprights and into the endgrain of the moulding support arms.
The other two pictures are of a much bigger rack, which is the one I described earlier. It's made with mainly 46mm square timber and it's glued and screwed as above. This one has about 450 lengths of moulding on it and its fixed to the wall with lots of number 12 x 5" woodscrews.
Both racks have been in use for over three and a half years. Using wood saved me a lot of money at the time, which was important when I made them as I could not afford anything else. However, it was hard work doing them and I've got more of these and some vertical racks just about anywhere I could put them.
If time is more important than money, then the Lion tubular steel ones are excellent, one of my local framing friends has one which I've had a good look at and it's a good solid job too.
Merlin wrote:
So now we can start a thread on workshop images... Come on Guys and Gals. Show us yours....
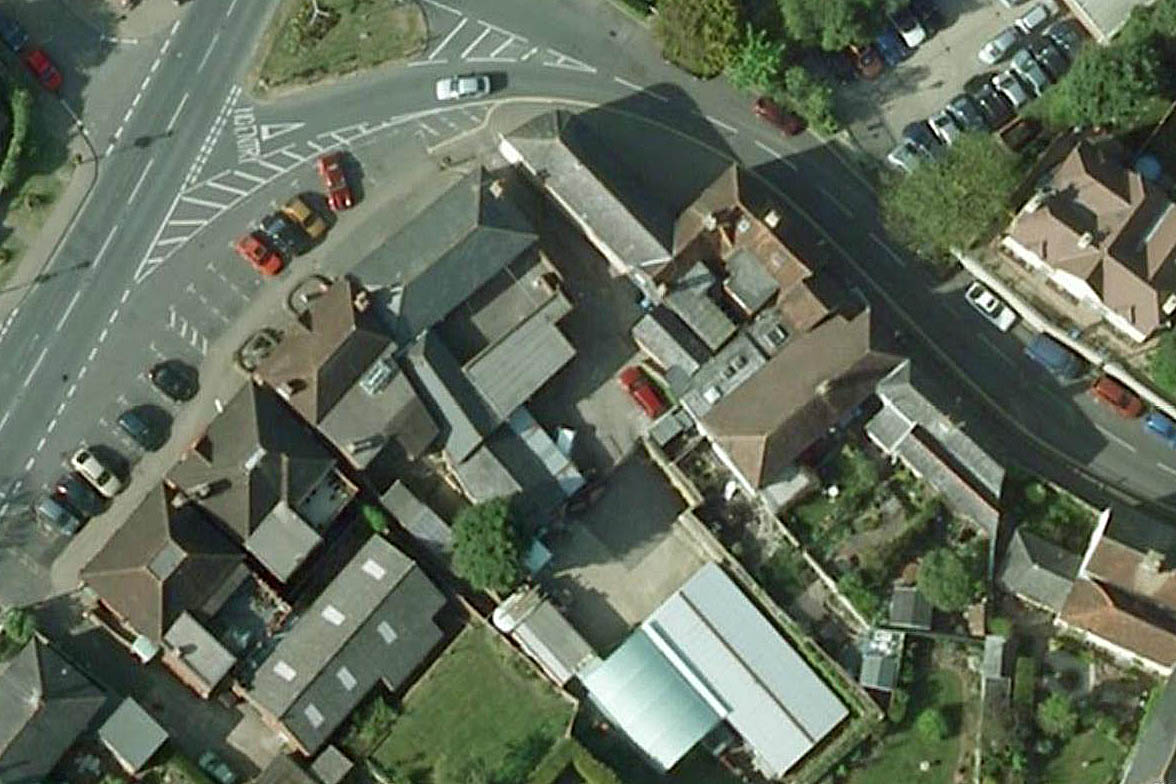
Ok - no new photos of mine - but the latest version of Google Earth has got good definition of my area now - I've checked back on the thread we did when I asked for postcodes and I seem to be in the only area, from those that posted, that has been updated.
So - I have ariel shots of my workshop! Go to Google earth and fly to BN164EA - from the cross hairs go right 2 o'clock 30 metres. Red estate car in light, white car in shade partially obscured.
My workshop porch is what is partially obscuring the white car.
The ground floor of that 'L' shaped building is our gaff and my workshop is the small part of the 'L' - the roof between the white car and the tree.
Hope this makes sense!
I'd cut and paste a piccy here - but I'm far too busy (OK Ok - no clue how to - not from Google earth)
Roboframer wrote:I'd cut and paste a piccy here - but I'm far too busy (OK Ok - no clue how to - not from Google earth)
If Google Earth won't let you copy an image to the clipboard, you can use Alt-PrintScreen to capture your screen to the clipboard. Paste from the clipboard into Photoshop or summat, and crop the image to the bit you are interested in.
........Áine JGF SGF FTB .Briseann an dúchas trí shuiligh an chuit.
The upstairs rear (flat roof) used to be part of this shop too but the last tenant sub let it to reduce his rent we tried to get it back when we moved in but they are big pals of the landlord and now rent it direct off him.
Actually it's not the whole ground floor that is ours either - the left of the front main bit - about a quarter of it, is an estate agents - which also used to be part of this shop but was let go for the same. We have first refusal if they ever give it up, and if they do it will be all mine - just framing - no riff-raff.
If you Google earth my home postcode BN16 4LX you can see my massive commute!