Hi,
I will find my one as not on my phone, but not disimilar to this one i found.
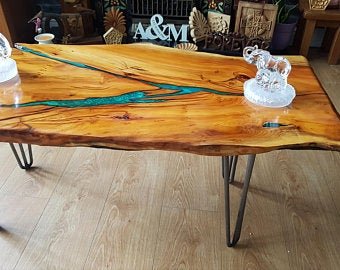
- il_340x270.1906834395_9zsn.jpg (27.72 KiB) Viewed 2544 times
My one was from an oak tree on a nearby farm. They wanted a coffee table and as it had splits and imperfections, resin was a good way of filling these. I think i took some WIP photos so will dig those out.
The principle is the same for using on a frame. I had to make a sealed bath for the oak to sit in as the splits in the oak went all the way through. I used celotex insulating sheets as i use those when cutting with track saws.
I used epoxy resin and hardener and added colour pigments. I have thought about doing a frame with it, but like all things, it's finding the time.
The method would be to make the wooden frame, then create a reservoir to pour resin in using celotex on inside and outside of frame.
Then pour in and you will get a perfect level epoxy frame. Then is is just a lot of sanding and polishing. You might find a few imperfections, but you can just fill these I put mine through a big belt sander. I used if memory serves, a polyurethane varnish.
I used epodex brand and i looked and you can get platinum silver pigment.
The even easier way is use a scoop moulding and fill the scoop with resin.
I will find my photos and stick them up on here, but if you look on youtube, you will see loads of amazing examples.
Cheers
Nick
